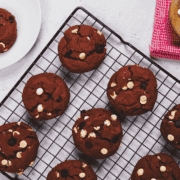
Homemade Crunch Bars

My dream is to lose weight, but this mouth just can’t stop chewing *lol*. The other day when we were hanging out, Helena casually said, “There are actually plenty of healthy snacks that are sweet and tasty, as long as we’re willing to make them.”
I just happened to be holding a chocolate brownie at the time, and for some reason it suddenly reminded me of those chocolate snack bars I always buy outside.
And you know what? Helena was right. Why keep buying them...who knows what preservatives are in there. Might as well just make them myself, rite?
I remember the day I perfected this recipe. It was a rainy afternoon, my kids were home sick, and all I had were pantry staples. I poured a mug of coffee, dumped crisped rice cereal and butter into a bowl, then microwaved the chocolate to a glossy finish.
I took that first bite, I knew I'd stumbled on something special. The chocolate was smooth, the peanut butter mellow, and the rice cereal crackled joyfully.
Since then, I've made this favorite candy bar for potlucks, midnight cravings, and after‑school snacks. A friend once said, "These should be illegal, they're that good." That kind of reaction never gets old.
I've also tested variations: stirring in chopped nuts, swapping in dark or semi-sweet chocolate chips, even forming cups instead of bars. Every tweak taught me more about balance: too much peanut butter softens the bar, too little makes it dry. After dozens of batches, the proportions below hit the best texture every time.
WHY I LOVE THIS RECIPE
With over ten years of testing and sharing crunch bars with friends and family, I can confidently call this one of my top snack recipes. Here's why it stands out:
- Simple ingredients: pantry staples? C'mon, everyone should have these!
- Minimal prep: no baking, just stir, press, chill
- Customizable: add nuts, seeds, dried fruit, or different chocolates
- Kid‑approved: perfect for lunchboxes
- The perfect texture: smooth chocolate meets crispy rice cereal for satisfaction
A LITTLE BACKGROUND ON ENERGY BARS

Energy bars first gained popularity in the 1980s as a convenient fuel source for athletes, hikers, and busy people on the go. They were designed to deliver a quick mix of carbohydrates, protein, and fats, wrapped in a portable, stable format. Over time, they evolved and entered the snack world, with a wide range of flavors and ingredients.
You can skip the preservatives and adjust the ingredients to your taste and dietary needs. For a deeper dive into the history and science of energy bars, check this overview from Essfeed.
INGREDIENTS FOR CRUNCH BARS
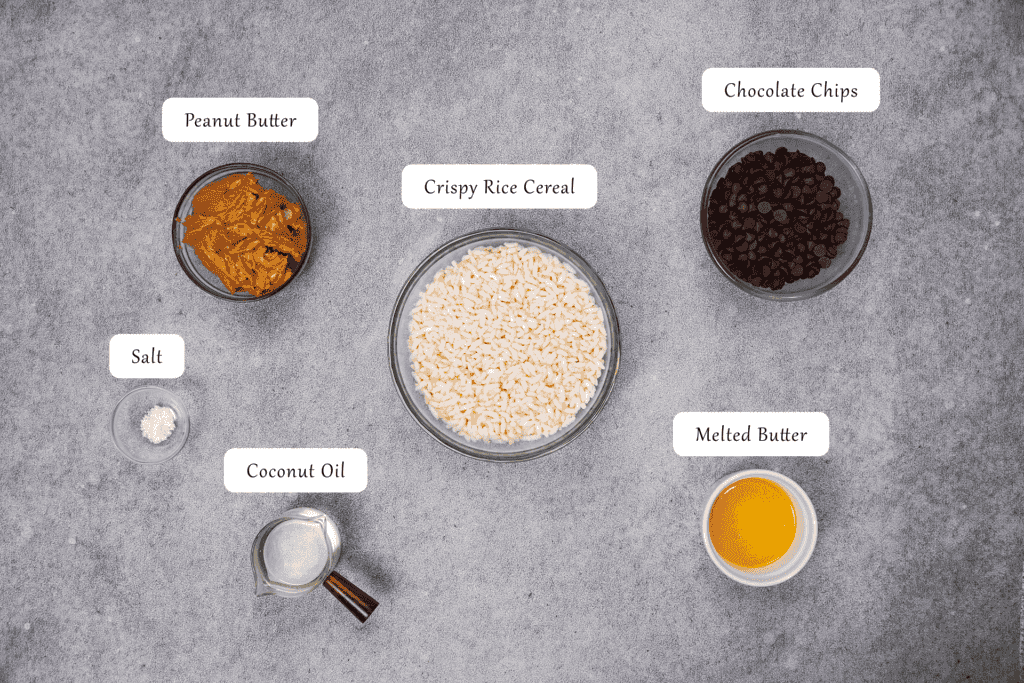
- 2 ½ cups crispy rice cereal
- ¼ cup melted butter
- 1 ½ cups chocolate chips
- 1 cup crunchy peanut butter
- ¼ cup coconut oil
- ¼ teaspoon salt
HOW TO MAKE CRUNCH BARS
Line an 8×8‑inch square pan with parchment paper for easy removal and straight edges.

In a large bowl, combine the cup crispy rice cereal with melted butter and stir until every flake is lightly coated.

Next, melt the chocolate mix. In a microwave‑safe bowl, add chocolate chips, crunchy peanut butter, coconut oil, and salt.

Microwave for 1 minute, then stir.

Continue in 30‑second bursts, stirring each time, until the mixture is smooth and fully melted.

Pour the warm chocolate‑peanut‑butter mixture over the cereal. Stir gently until the cereal is evenly coated.

Transfer it to the prepared pan, pressing down gently to form a uniform layer about 1 inch thick.

Chill the pan in the fridge for 1–2 hours, or until the bars are firm to the touch.

Then lift out the parchment, slice your homemade candy bar into squares or rectangles, and serve. Enjoy!

TROUBLESHOOTING TIPS

Drawing from years of hands‑on making and tweaking this recipe, here are solutions to common issues:
- Bars too soft? Too much coconut oil or peanut butter can soften them. Chill longer or reduce the oil by a tablespoon.
- Bars are crumbly? You may have under‑mixed or under‑pressed the base. Ensure cereal is fully coated and pack firmly before chilling.
- Chocolate layer cracked on cutting? Let bars come to room temperature for 5–10 minutes before slicing for cleaner cuts.
- Peanut butter flavor too mild? Use natural peanut butter or add 1–2 tablespoons more to boost flavor without affecting texture too much.
- Want a new twist? Add 1–2 tablespoons of maple syrup to the melted mix for a subtle, richer sweetness.
STORING TIPS FOR YOUR ENERGY BAR
Here's how I store crunch bars to keep them fresh and delicious:
- Fridge: Store in an airtight container, up to one week. Optional: separate layers with parchment paper.
- Freezer: Slice bars, wrap individually in parchment, store in a zip‑top bag. It's okay for up to 3 months.
- Room temperature: If your kitchen is cool, bars can stay out in a sealed container for a couple of days.
SUBSTITUTIONS FOR CRUNCH BAR
I've tested different swaps for dietary needs, allergies, or just curiosity. Here are some that actually work:
- Nut-free: Use sunflower seed butter or cookie butter instead of peanut butter. The taste will be slightly sweeter, but it's still good.
- Dairy-free: Choose dairy-free chocolate chips and plant-based butter. Brands like Enjoy Life and Miyoko's offer reliable options.
- No coconut oil? Use oils like avocado or a bit more butter. Just avoid strong-flavored oils like olive or sesame.
- No crispy rice cereal? Cornflakes or puffed quinoa can work. The texture will differ, but you'll still get that crunch.
VARIATIONS FOR CRUNCH BARS
Once you've nailed the base recipe, it's easy to get creative. These are some tried-and-true flavor twists:
- Crunchy caramel: Swirl in a few spoonfuls of thick caramel sauce before pressing into the pan. Add a sprinkle of flaky salt on top.
- Chocolate mint: Add ½ teaspoon peppermint extract to the melted chocolate mixture. Top with crushed mint candies or Andes mints.
- Trail mix: Fold in chopped dried fruit, pumpkin seeds, and mini chocolate chips. Makes a great anytime snack.
- Espresso crunch: Add 1 teaspoon instant espresso powder to the melted chocolate mix. Pairs well with dark chocolate chips.
- Holiday spice: Mix a dash of cinnamon or pumpkin pie spice into the cereal for a warm, cozy vibe.
- Power crunch version: Add crushed candy bar bits or protein crisps for a more filling snack.
FAQs
MORE DELICIOUS RECIPES TO TRY
- No-Bake Chewy Apricot Muesli Bars
- Air Fryer Brownies
- Chocolate Coconut Energy Balls
- Healthy Chocolate Crackles (No Copha)
- Strawberry Mango Popsicles
- Banana Coconut Muffins
If you’ve tried this recipe, I’d love to hear how you enjoyed it! Pop a comment and a star rating below!
You can also follow me on FACEBOOK, INSTAGRAM and PINTEREST to keep up to date with more delicious recipes.
RECIPE

Homemade Crunch Bars
10 minutes
60 minutes
70 minutes
Make delicious chocolate crunch bars with layers of melted chocolate, peanut butter, and crispy rice for a delightful treat.
0 Stars (0 Reviews)
servings
Scale
Ingredients
Instructions
Line an 8×8‑inch square pan with parchment paper for easy removal and straight edges.
In a large bowl, combine the cup rice krispies with melted butter and stir until every flake is lightly coated.
Next, melt the chocolate mix. In a microwave‑safe bowl, add chocolate chips, crunchy peanut butter, coconut oil, and salt.
Microwave for 1 minute, then stir.
Continue in 30‑second bursts, stirring each time, until the mixture is smooth and fully melted.
Pour the warm chocolate‑peanut‑butter mixture over the cereal. Stir gently until the cereal is evenly coated.
Transfer it to the prepared pan, pressing down gently to form a uniform layer about 1 inch thick.
Chill the pan in the fridge for 1–2 hours, or until the bars are firm to the touch.
Then lift out the parchment, slice your homemade candy bar into squares or rectangles, and serve. Enjoy!
- The nutrition information provided is for one bar, based on a batch yielding 12 bars and using semi-sweet chocolate chips. It is automatically calculated and should be considered an estimate, not a guarantee.
- No crispy rice cereal on hand? For a quick fix, cornflakes or puffed quinoa can work for you. The texture might be different, but you’ll still get that satisfying crunch.
Did you make this? Tell us about it!
Nutrition Facts
Amount Per Serving:
Calories
110kcalCarbohydrates
12gProtein
5gFat
8gSaturated Fat
3gPolyunsaturated Fat
2gCholesterol
3mgSodium
70mgFiber
2gSugar
10g